Laptops are compact, powerful machines—but their small size also makes them vulnerable to dust buildup and overheating. One of the most overlooked maintenance tasks is cleaning the internal fan, which plays a critical role in cooling the system. When done improperly, however, cleaning a laptop fan can cause expensive damage. Understanding the correct process ensures the hardware remains protected while restoring optimal airflow.
TLDR: Cleaning a laptop fan safely requires proper tools, careful disassembly, and protection against static electricity. Dust should be removed using compressed air and gentle brushing without forcing the fan to spin excessively. Avoid using vacuums or liquid cleaners directly on internal components. With patience and attention to detail, most users can safely restore airflow and prevent overheating issues.
Why Cleaning a Laptop Fan Matters
Laptop fans regulate internal temperature by pushing hot air out of the system. Over time, dust, pet hair, and debris accumulate inside the cooling system. When airflow becomes restricted, several issues may occur:
- Overheating during basic tasks
- Sudden shutdowns
- Loud or constant fan noise
- Reduced performance due to thermal throttling
- Shortened hardware lifespan
If a laptop consistently feels hot or the fan runs loudly even when browsing the web, it may be time for cleaning.
Tools Needed for Safe Cleaning
Proper preparation helps avoid accidental damage. Before opening the device, gather the correct tools:
- Compressed air can
- Small Phillips screwdriver
- Anti static wrist strap (recommended)
- Soft brush (electronics safe)
- Microfiber cloth
- Small container for screws
Important: A household vacuum cleaner should not be used directly on internal components because it can generate static electricity, potentially damaging sensitive circuitry.
Safety Precautions Before Starting
Cleaning a laptop fan requires careful handling of delicate components. The following precautions minimize risk:
- Shut down the laptop completely.
- Unplug the power adapter.
- If possible, remove the battery.
- Hold the power button for 5–10 seconds to discharge residual electricity.
- Work on a clean, static free surface.
Using an anti static wrist strap is recommended, especially in dry environments where static electricity builds easily.
Step-by-Step Guide to Cleaning a Laptop Fan
1. Access the Fan Compartment
Most laptops require removal of the bottom panel to access the cooling system. Carefully turn the laptop upside down on a soft surface.

Use the correct screwdriver to remove all visible screws. Some screws may be hidden under rubber feet or stickers. Keep screws organized to ensure proper reassembly.
Gently pry open the bottom panel using a plastic tool or fingernail. Avoid metal instruments that may scratch or damage the casing.
2. Locate the Cooling Fan and Heat Sink
Inside, the fan is typically positioned next to copper heat pipes and a metal heat sink assembly. Identify the fan blades and ventilation area where dust often accumulates.
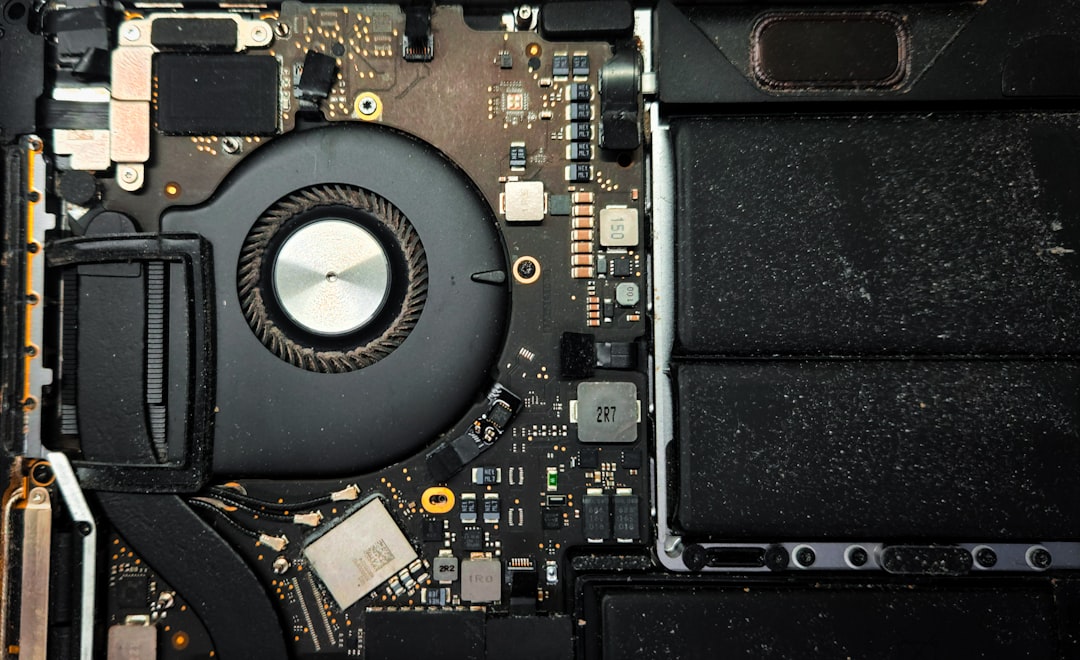
This is where most debris collects, especially along the vents.
3. Prevent the Fan from Spinning
Before applying compressed air, gently hold the fan blades still using a non conductive tool such as a cotton swab. Allowing the fan to spin freely while blasting air can:
- Create electrical feedback into the motherboard
- Damage internal bearings
- Reduce fan lifespan
4. Apply Compressed Air in Short Bursts
Use short, controlled bursts of compressed air to blow dust out of the fan and ventilation ports. Hold the can upright to prevent moisture discharge.
Blow air both into the fan and outward through the exhaust vents to clear trapped debris. Continue until visible dust is removed.
5. Use a Soft Brush for Stubborn Dust
If buildup is thick or sticky, gently loosen it with an electronics safe brush. Brush carefully along the fan blades and around the heat sink fins. Avoid applying pressure to the motherboard.
6. Clean the Ventilation Openings
Dust frequently builds up where air exits the laptop. Clearing this area improves airflow significantly.
 compressed air cleaning laptop vent, close up dust removal, technician hands[/ai-img>
Ensure all visible debris is removed before reassembly.
7. Reassemble the Laptop
Once cleaning is complete:
- Replace the bottom panel carefully.
- Reinsert and tighten screws evenly.
- Reconnect the battery if removed.
- Plug in the power adapter.
Power the laptop on and listen to the fan. It should sound smoother and possibly quieter than before.
How Often Should a Laptop Fan Be Cleaned?
Cleaning frequency depends on the environment:
- Every 3–6 months in dusty or pet friendly homes
- Every 6–12 months in clean environments
- More frequently if the laptop is used on soft surfaces like beds or couches
Placing a laptop on hard, flat surfaces helps reduce dust intake and improves ventilation.
Common Mistakes to Avoid
Many hardware issues occur not during cleaning, but because of improper technique. Below are frequent mistakes:
- Using a vacuum directly on components
- Spraying liquid cleaners inside the laptop
- Forgetting to disconnect power
- Losing screws or mixing screw sizes
- Forcing panels open aggressively
- Allowing compressed air can to tilt and release liquid propellant
Patience is crucial. Rushing the process increases the likelihood of damaging internal hardware.
When to Seek Professional Help
Although many users can clean their laptop fan safely, certain situations require professional service:
- The laptop is still under warranty (opening it may void coverage)
- The design requires full motherboard removal to access the fan
- The user feels uncomfortable handling internal components
- Thermal paste replacement is needed along with fan cleaning
Professionals can also inspect for deeper issues such as failing fans or heat sink misalignment.
Signs the Cleaning Was Successful
After cleaning, noticeable improvements may include:
- Lower operating temperatures
- Reduced fan noise
- Smoother performance
- Fewer thermal shutdowns
Temperature monitoring software can confirm improvements, showing reduced CPU and GPU heat during use.
Additional Tips for Preventing Dust Buildup
Preventive maintenance reduces the need for frequent cleanings:
- Use a cooling pad with built in fans
- Keep workspace dust free
- Avoid placing laptops on carpets or fabric
- Store the laptop in a sleeve when not in use
- Regularly clean air vents externally with compressed air
Maintaining airflow is significantly easier than restoring it after heavy blockage.
FAQ
Is it safe to clean a laptop fan without opening it?
Blowing compressed air into the vents without opening the case can remove some dust, but it may also push debris deeper inside. For thorough cleaning, accessing the fan directly is safer and more effective.
Can compressed air damage laptop components?
Compressed air is safe when used properly in short bursts and held upright. Avoid shaking the can excessively or tilting it, as this may release liquid propellant.
Should the fan spin while cleaning?
No. The fan should be held gently in place to prevent excessive spinning, which can harm the motor or cause electrical feedback.
What if the laptop still overheats after cleaning?
If overheating continues, the issue may involve dried thermal paste, poor heat sink contact, or a failing fan. Professional servicing may be necessary.
Can a vacuum cleaner be used instead of compressed air?
A standard household vacuum is not recommended due to the risk of static discharge. If used, it should never directly touch internal components.
How long does the cleaning process take?
For most laptops, cleaning takes between 20 and 45 minutes, depending on design complexity and dust buildup.
Cleaning a laptop fan safely requires precision, preparation, and patience. By following proper techniques and avoiding common mistakes, users can extend the lifespan of their devices, improve performance, and reduce the risk of overheating—without compromising delicate hardware.
Comments are closed.